In one I had to lighten the greyscale tone of one of the colours and darken the tone of the contrasting colour as much as possible. In the second version I had to perform the reverse.
It was recommended that this exercise was performed on a RAW image due to the direct access to the original three channels. A default greyscale image was created as a reference so I could note the effect that moving the sliders had on the entire image. It was also interesting to note what effect these adjustments had on the creative quality of the image.
Interesting and helpful webpage...
Understanding Colour 2 – Converting Colour to Black and White Tutorial – Photography Tutorials, News and Reviews For The Real...
Red and Green
As per the remit I chose an image which contained the strong contrasting colours of red and green.
 |
| Original Unedited colour version |
 |
| Default Black and White Conversion |
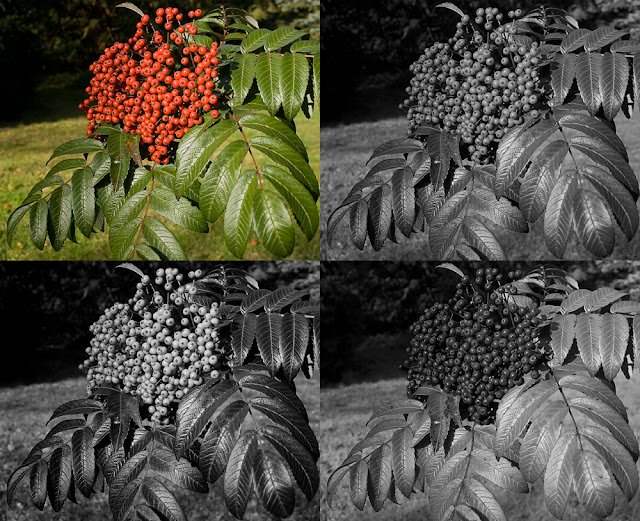
The first adjustment I made was to increase the red tones and reduce the green. The effect this had on the image was to lighten the reds and darken the greens. I could move the green slider all the way to the left having a value of -200 and still retain detail, even though the leaves and background became very dark. Moving the red slider to the full extent lightened them too much as if the image was over exposed.
 |
| High Red Low Green |
 |
| High Green Low Red |
 |
| Adjustments to the extremes |
Here are all four images together for comparison purposes.

My personal preference was for the high red/low green combination. I created a final photograph by making local adjustments using a levels adjustment layer which created more of a contrast and a better black and white image.
Although the exercise called for only one image to be adjusted I was curious to see what happened with blue/yellow tones.
 |
| Default Colour |
 |
| Default Black and White |
 |
| High Yellow Low Blue |
 |
| High Blue Low Yellow |
 |
| Comparisons |
It was interesting to note that other tones in the background altered, for example the red telephone box became lighter with the high yellow/low blue adjustment.

No comments:
Post a Comment